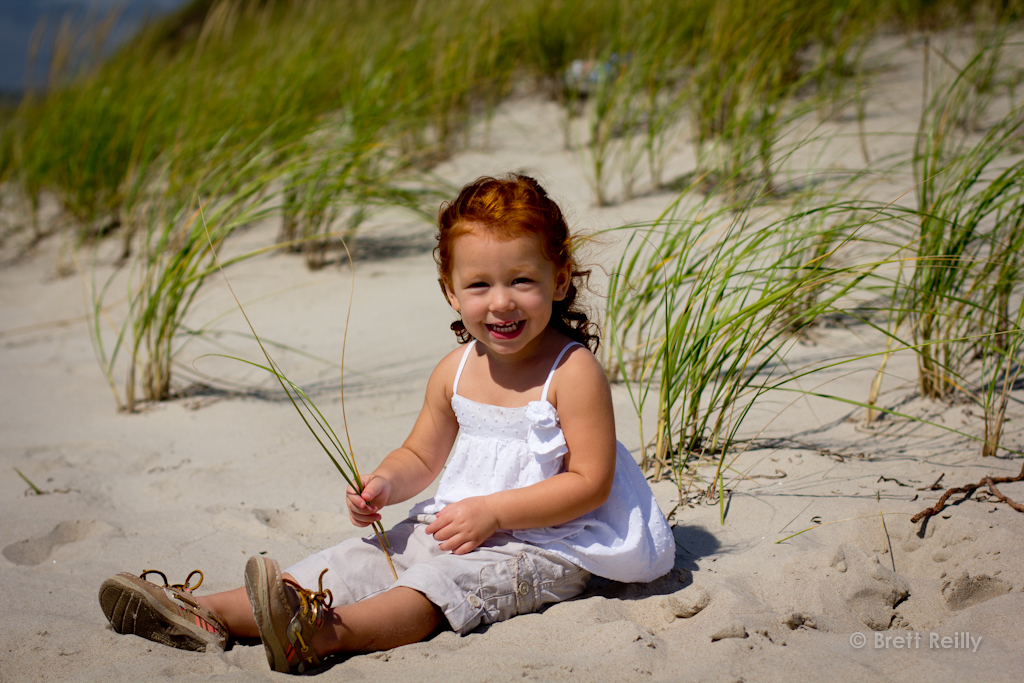
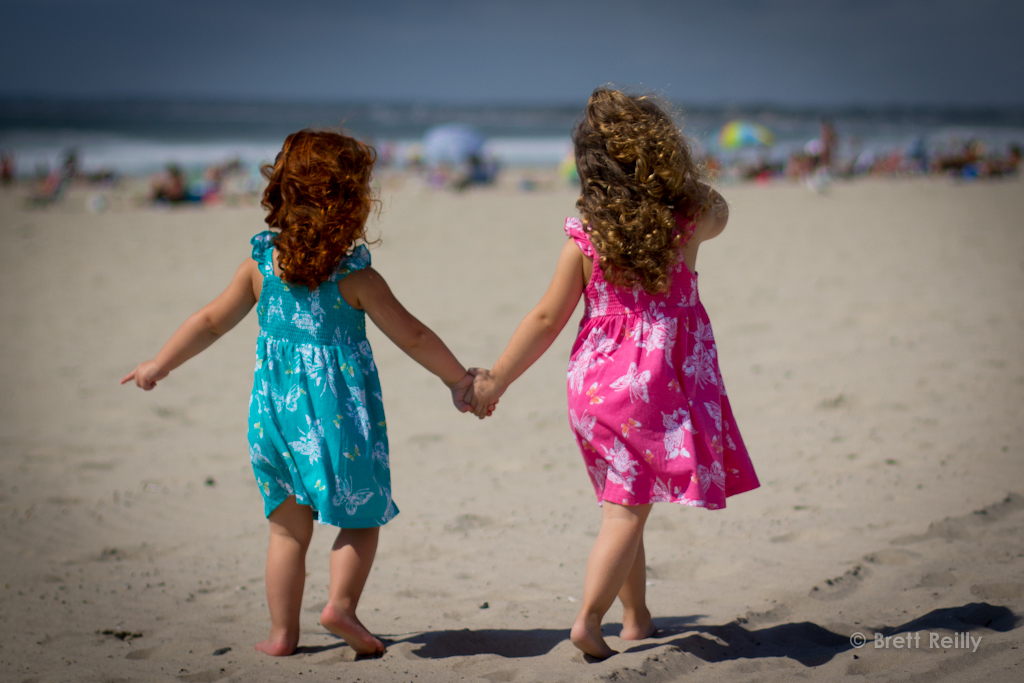
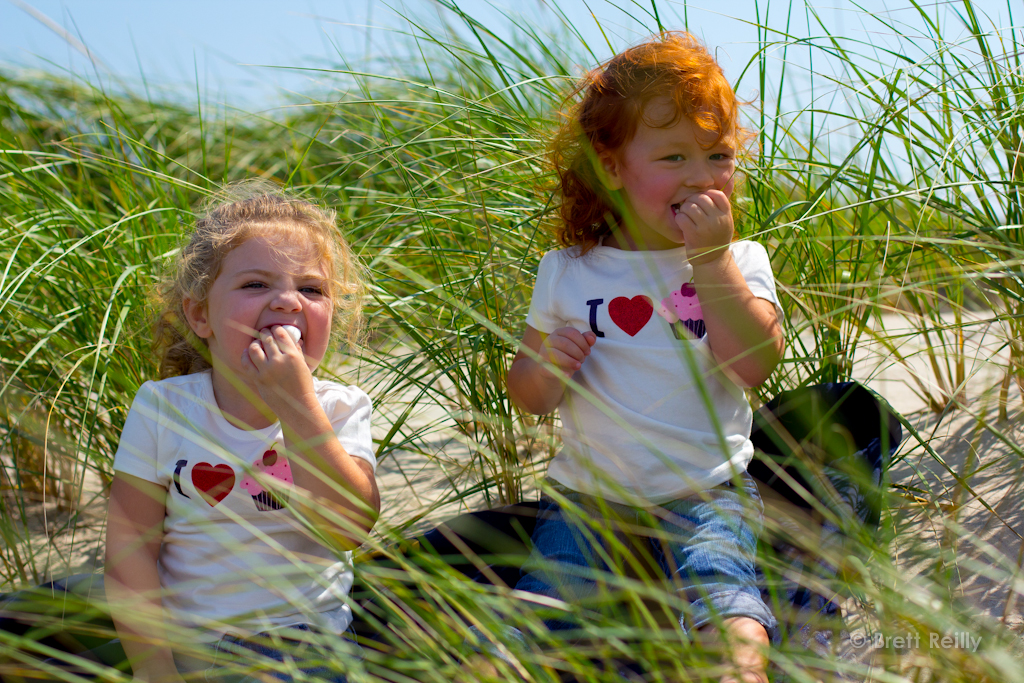
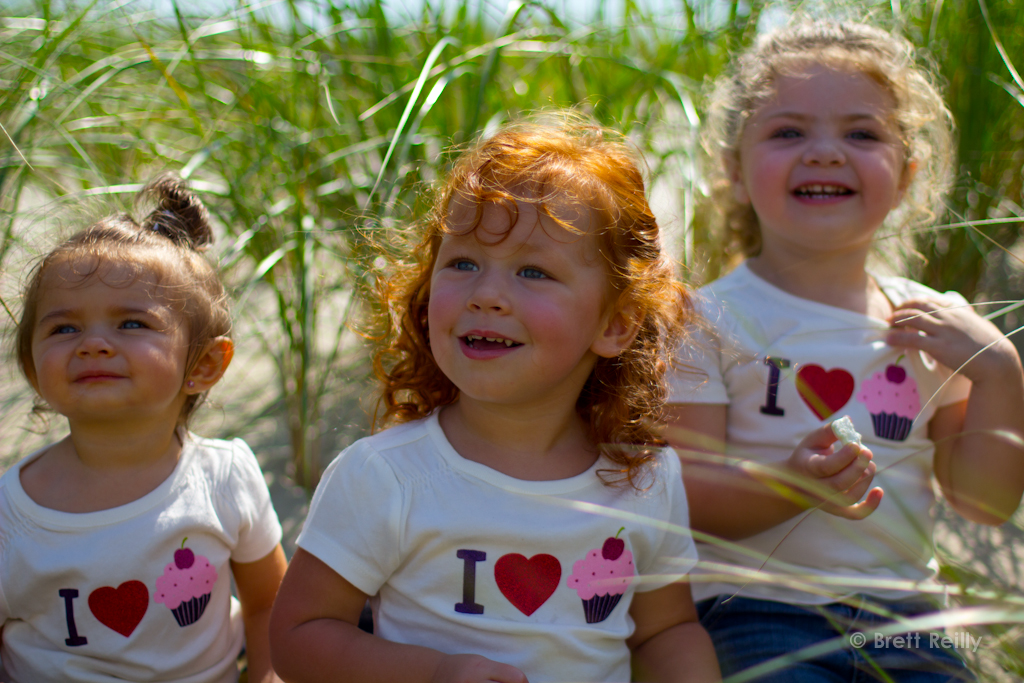
When I was asked to take pictures of my cousins daughters at the beach I couldn’t have been more excited. Three of my close cousins (I consider them as my brothers) have daughters and all three are unbelievably cute and lively so attempting this photo shoot was going to be fun but also tough to entertain all three at the same time. Luckily I had a group of women and my girlfriend close by to help me out with the entertainment part. My aunt brought a bunch of props, including bubbles, sand shovels, buckets, changes of clothes, and even marshmallows! The props came in handy when the girls started to get antsy and seemed to be sick of taking pictures, so it was very helpful to have all of those props and women entertaining them.
Since some people may not even know where to start when taking quality portraits on the beach I figured I would make a tutorial. Below I explain my camera and equipment and then break down some tips so you can easily see what I do to take portraits of children.
Prepping for a beach portrait for children
While you can snap some nice pictures with a compact camera, a DSLR just blows away a small compact camera for a bunch of reasons. One is that the sensor on a compact digital camera is much smaller and can’t capture as much detail. The other part is the lens itself; a quality DSLR lens can provide amazing results. When used right, you’ll be amazed at your portrait results at the beach. While I’m not a professional photographer, and I’m sure there are a ton of things I could improve on, I’ll show you tips on how I take portrait pictures of children at the beach.
 I threw (not literally) my Cannon 60d into my bag along with a prime lens. I found my Canon 60D DSLR and my lens on Craigslist for about $1000. That’s really a great price when you look at how much the body and lens are separate (lens is around $350, body around $900). If you think $1000 is a lot for a camera and lens, it might be if you don’t plan on using it a lot. But if you have children and pets and love taking pictures it’s completely worth it! The other part of this is that it includes a much higher quality lens than the one that would have come with the camera. Any camera sold with a lens in a store is almost always a “kit lens”. You don’t really want to stick with a kit lens because the quality is very poor. They normally advertise the huge zoom range, like 14mm to 120mm or something, which sounds great, but trust me, you don’t want it. You want a non kit lens that has high quality optics. It’s what makes the difference between a crisp picture with blurred background and intense color to a boring image.
 Back to my lens- a prime lens doesn’t offer any zoom, but the quality is unmatched compared to a kit lens or a zoom lens. Of course there are high quality zoom lenses where it’s comparable, but the feel you get when using a prime lens for portraits is great. You feel more connected, active, and in control since you don’t have to rely on a zoom. I use a Canon EF 50mm f/1.4 USM Standard lens for portraits or even for just as a walkaround lens. You would think you would be dying to get your hands on a zoom lens, but believe me, you’ll get used to this lens because of the high bokeh (the circles in the blurry part of the picture) and background blur. You can open the aperture to 1.4, which helps you distinguish your subject from the background nicely. This lens is considered a standard lens, which is 50mm. On my Canon it’s more like an 85mm because of the sensor size, but “crop factor” and sensor size is another lesson in itself.
 Along with my camera and lens I brought a polarizing filter, which simply screws on to the front of my lens. A polarizor is a must-have if you are into outdoor photography because it adds vibrant colors and darkens a boring sky if there’s no color. You can also rotate some of them until you get the color you like. One other huge factor is that you can rotate it when taking pictures of water and it will get rid of any reflection, resulting in unique pictures you wouldn’t have without it.
Here are 5 tips to use when taking portraits of children at the beach:
- Shoot in aperture priority mode
Set your camera to aperture priority. All cameras are different so Google your camera to see how to set it to aperture priority. This makes it so you can have more control over blurring the background in your picture.
- Choose a lens that has a wide aperture
A wide aperture, means the blades in your lens are opened as wide as they can go, like a shade on a window. The more wide open the shade is the more light that will come into the room. With more light your camera will shot at a faster shutter speed. At the same time the focus will stay on whatever you are focused on and blur out everything else. This is called a small depth of field or DOF. So a f/1.4 aperture is a pretty wide setting and will blur a lot of the background. The lower the number the wider the aperture. So a f/22 aperture setting would be a very small aperture and would be able to keep everything in the frame in focus without blurring the background. This is a common aperture for landscape photographers who want everything crisp and clear. Go as wide as you can on your camera. You can play around with the setting if you want more background in the picture. Most of my pictures were in the f/1.8 to f/3 range. - Use a polarizing filter
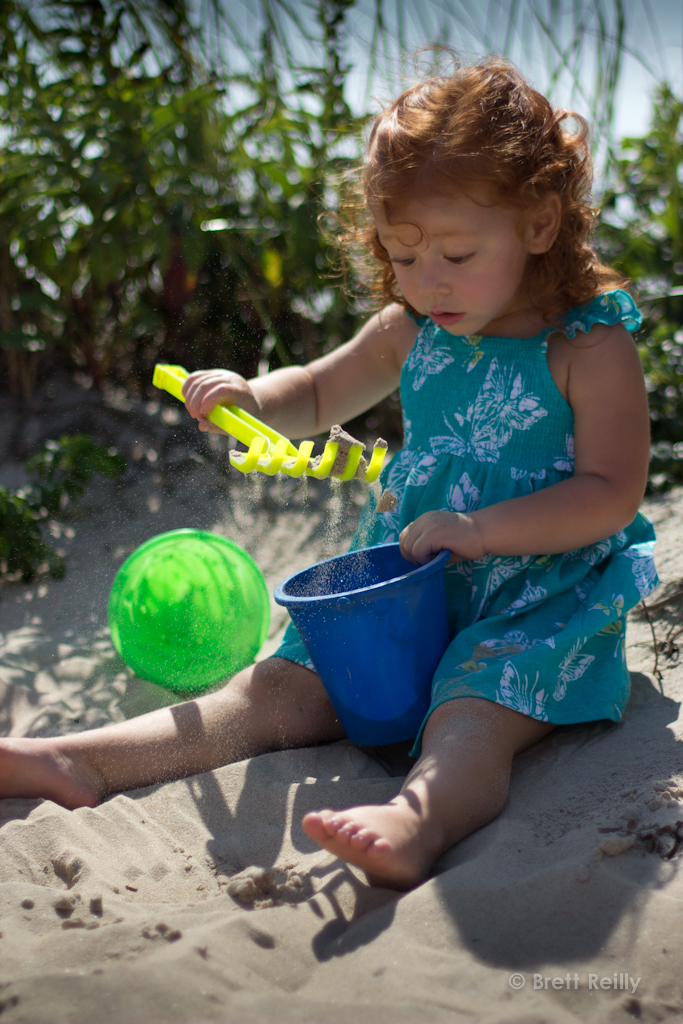
A polarizing filter is great for beach photography because it darkens blue sky’s and makes colors more vibrant. You can rotate it to get the color you want. It works best when you are shooting with the sun to your side. - Get up close and personal
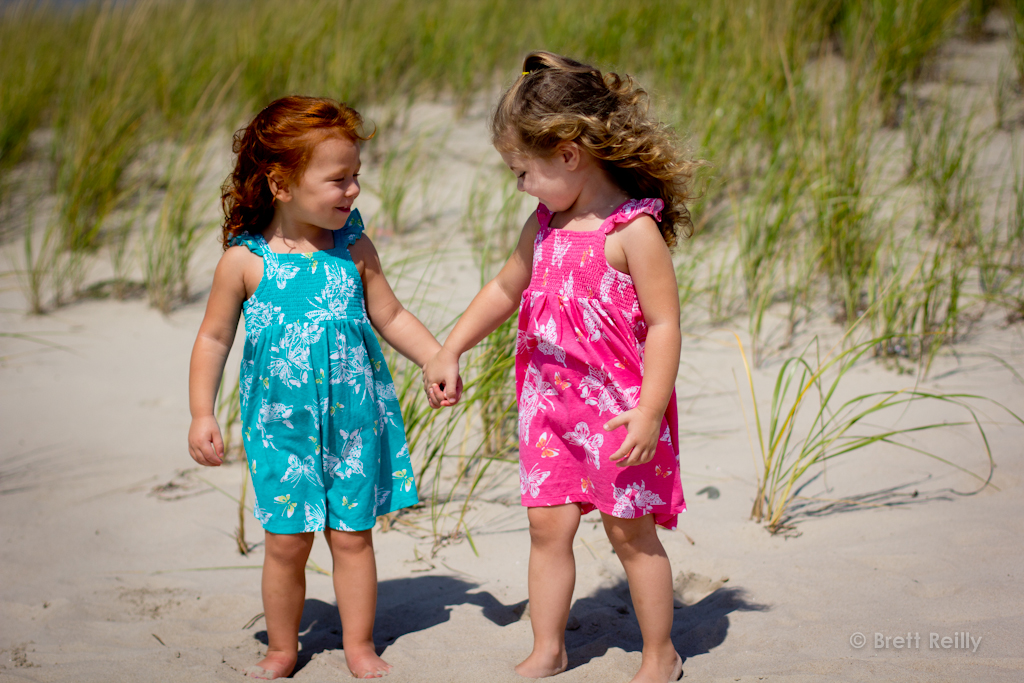
Some of the best shots are extreme closeups. You get great blur, detail, and can really feel the emotion of your subject when shooting close. You can also get great bokeh in the background. Colors look great in the background and you can even try shooting at different heights to incorporate vibrant sea grass, fences, and sand. - Bring company
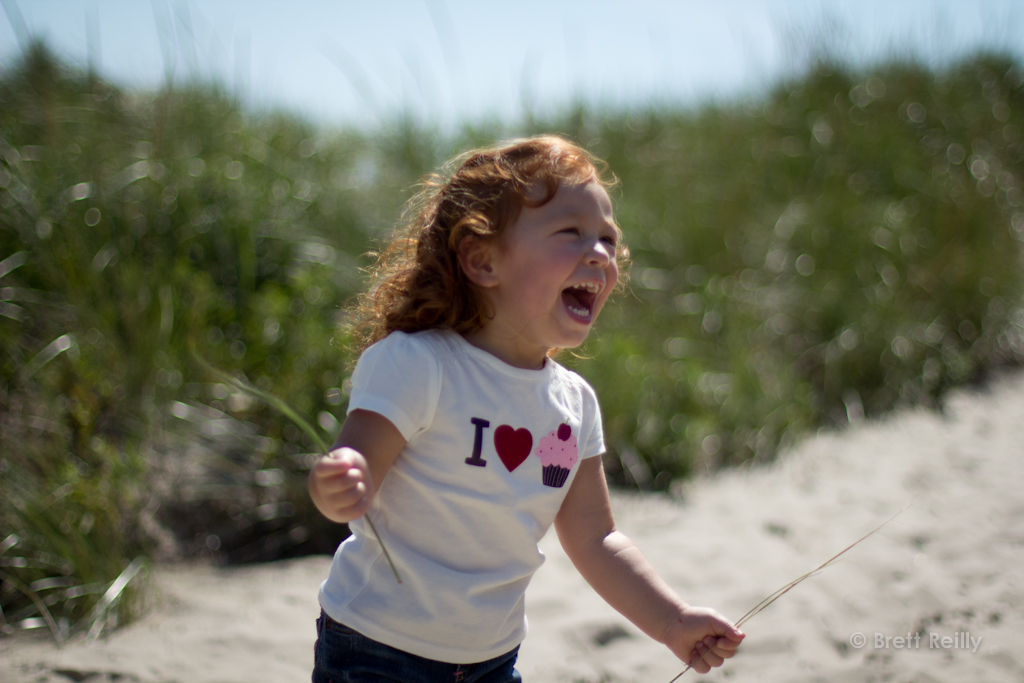
As I mentioned, I had a lot of help from my aunts and girlfriend. It was a load off my shoulders to have someone entertaining the girls while I was shooting. It’s tough to keep them smiling, dancing, and happy for a long time. The best tricks were the marshmallows, bubbles, asking them to show their teeth, and asking them to show us a dance! - Take advantage of candids
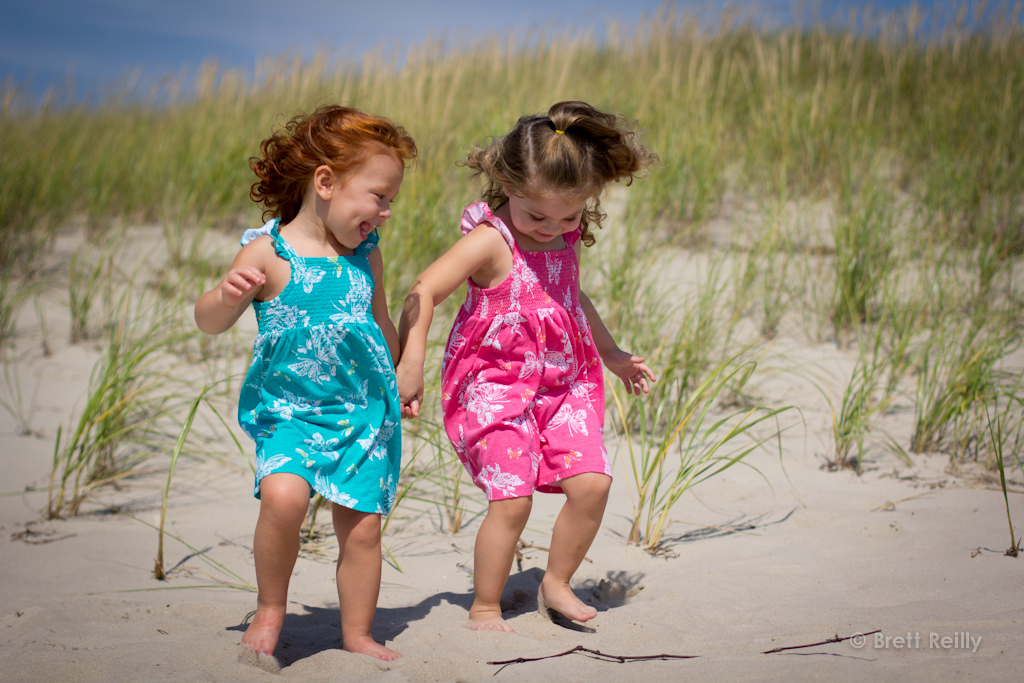
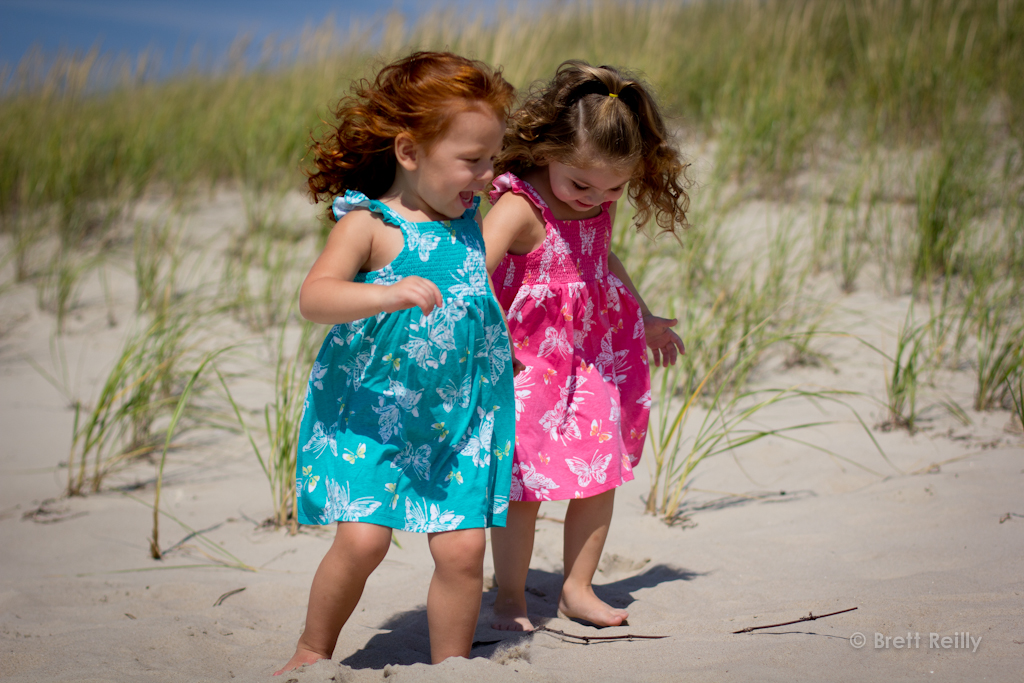
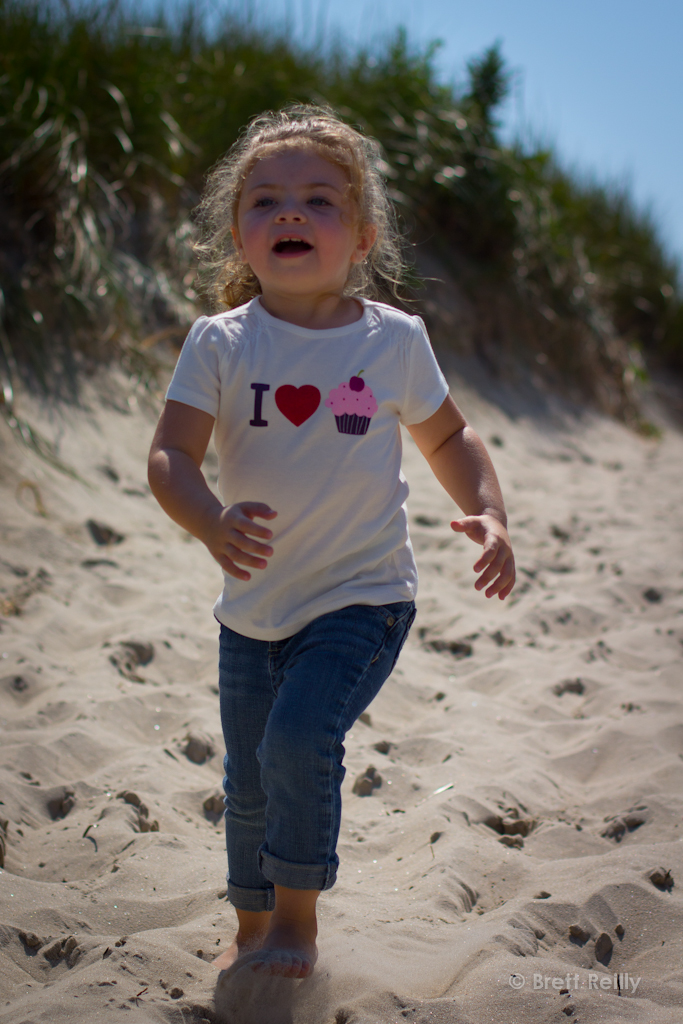
You don’t always need to get a picture of children staring straight into the camera. I personally enjoy taking candids and feel they are the best type of photograph. When they are laughing, playing, or moving around you can capture their true personality. - Avoid direct sunlight
The common misconception is that you need to have direct sunlight for pictures, when in fact it’s not good at all. Too much sun washes away colors and makes your subjects squint. It’s much better to shoot in partial shade or with the sun to your back or side. - Take some high speed continuous shots
The youngest of the children was around a year old and had a hard time keeping still in the sun. It was tough to get all three of them together at once, so when they were all entertained and smiling, it was important to take some high speed shots. You can have all three looking at you, but if one happens to blink, your shot is ruined. I also took some - Try random silly shots
Get up close and personal, give the kids marshmallows, blow bubbles. Keep it interesting and keep the atmosphere lively so you’ll have plenty of emotion to shoot. - Stay relaxed
It’s easy to get nervous and worked up and be worried about not getting a good shot. I always seem to end up with great pictures when I’m relaxed, focused, and don’t worry about the little things.

I hope you enjoyed my article on tips for photographing children at the beach. If you like them, please share! Here are the results of the photo-shoot!